主要内容
swagger(springfox) 可帮助开发人员设计,构建,记录和使用RESTful Web服务, 使后台开发人员与移动端开发人员更好的对接.
大多数用户通过Swagger UI工具可很简单识别和使用Swagger。
最大优点: 接口开发人员不用另外写接口文档,代码注释中写上swagger相关的注释就可以自动生成接口文档;
最大缺点: 对源代码侵入比较严重。
本文以 springfox-swagger2 V2.9.2 版本为例说明。
末了,还有个稍重量级竞品 RAP(阿里妈妈出品) , 感兴趣的可以去玩玩。
更新历史
+2018-11-04: 增加swagger注解具体说明
Maven 依赖
1 | <dependency> |
swagger2 配置文件
1 |
|
Spring 配置
SpringBoot
Springboot 可以直接使用
SpringMvc 配置
java based config
1
2
3
4
5
6
7
8
9
10
11
12
13
14
15
16
17
18
19
20
21
22
23
24
public class ApplicationConfiguration extends WebMvcConfigurerAdapter
{
...
// Maps resources path to webapp/resources
public void addResourceHandlers(ResourceHandlerRegistry registry)
{
registry.addResourceHandler("swagger-ui.html").addResourceLocations(
"classpath:/META-INF/resources/");
registry.addResourceHandler("/webjars/**").addResourceLocations("classpath:/META" +
"-INF/resources/webjars/");
}
...
}xml based config
1
2
3
4
5
6<!--<bean class="com.springfox.config.SwaggerConfig" /> 使用bean申明可以去掉@configuration-->
<!--扫描@configuration注解-->
<context:component-scan base-package="com.springfox.config"/>
<!--配置静态资源访问-->
<mvc:resources mapping="swagger-ui.html" location="classpath:/META-INF/resources/"/>
<mvc:resources mapping="/webjars/**" location="classpath:/META-INF/resources/webjars/"/>
接口举例
controller
1
2
3
4
5
6
7
8
9
10
11
12
13
14
15
16
17
18
19
20
21
22
23
24
25
26
27
28
29
30
31
32
33
34
35
36
37
38
39
40
41
42
43
44
45
46
47
48
49
50
51
52
53
54
55
56
57
58
59
60
61
62
63
64
65
66
67
68
69
70
71
72
73
74
75
76
77
78
/**
* 类功能说明:注册用户 controller
*/
public class CustomerAppController {
/**
* 第三方登录 - 刷新
*
* @param token QQ授权后的access_token 或 微信的 refresh_token 或 微博的 refresh_token
* @param loginType 1: QQ; 2: 微信; 3:微博
* @param phone 手机号码
* @param valid 校验码
* @return
*/
public ResponseEntity<ThirdLoginToken> refresh(
String token,
int loginType,
String phone,
String valid
) throws IOException {
return thirdLogin(token, loginType, LOGIN_REFRESH.REFRESH.ordinal(), phone, valid);
}
/**
* 获取用户信息
*
* @return
*/
public ResponseEntity<CustomerEntity> getCustomer(){
。。。
return ResponseEntity.ok(customer);
}
/**
* 绑定 qq, 微信,微博等
*
* @param token
* @param loginType
* @return
*/
public ResponseEntity updateCustomerThirdLogin( String token, int loginType) throws IOException {
ThirdLoginToken loginToken = new ThirdLoginToken();
...
return ResponseEntity.ok(loginToken);
}
}entity
1
2
3
4
5
6
7
8
9
10
11
12
13
14
15
16
17
18
19
20
21
22
23
24
25/**
* 第三方登陆返回 VO
*/
private class ThirdLoginToken {
public String jwt;
public String accessToken;
public String refreshToken;
public String openId;
public ThirdLoginToken(String jwt, String accessToken, String refreshToken, String openId) {
this.jwt = jwt;
this.accessToken = accessToken;
this.refreshToken = refreshToken;
this.openId = openId;
}
}@Api:标志这个类为Swagger资源,根据config, 没标注的不会生成 swagger 的接口文档
@ApiImplicitParams,@ApiImplicitParam: 对参数进行说明, 其中dataType一定为小写; allowableValues 可限制 合法值得列表; required 指定该参数是否必须
@ApiOperation:描述了一种操作或通常针对特定的路径的HTTP方法。 response 指定返回值类型;authorizations 指定改接口的认证条件, apiKey 需要和 config的一致;
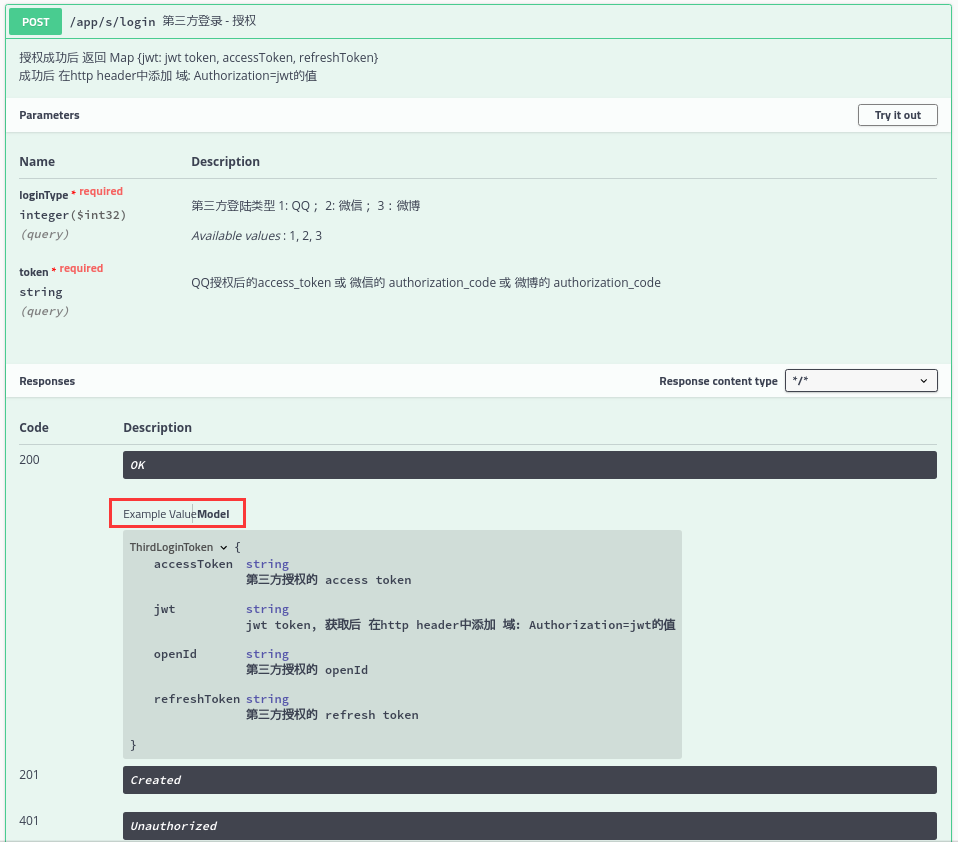
@ApiModel: 描述一个实体
@ApiModelProperty:描述一个字段
泛型返回值 response
ComResultVo<UserEntity> 这种带泛型的返回值,想要正常完全显示,需要注意如下:
ComResultVo内需要正确的get/set方法- controller 返回值
ComResultVo<UserEntity>一定要 标明泛型的具体值UserEntity
达到如下效果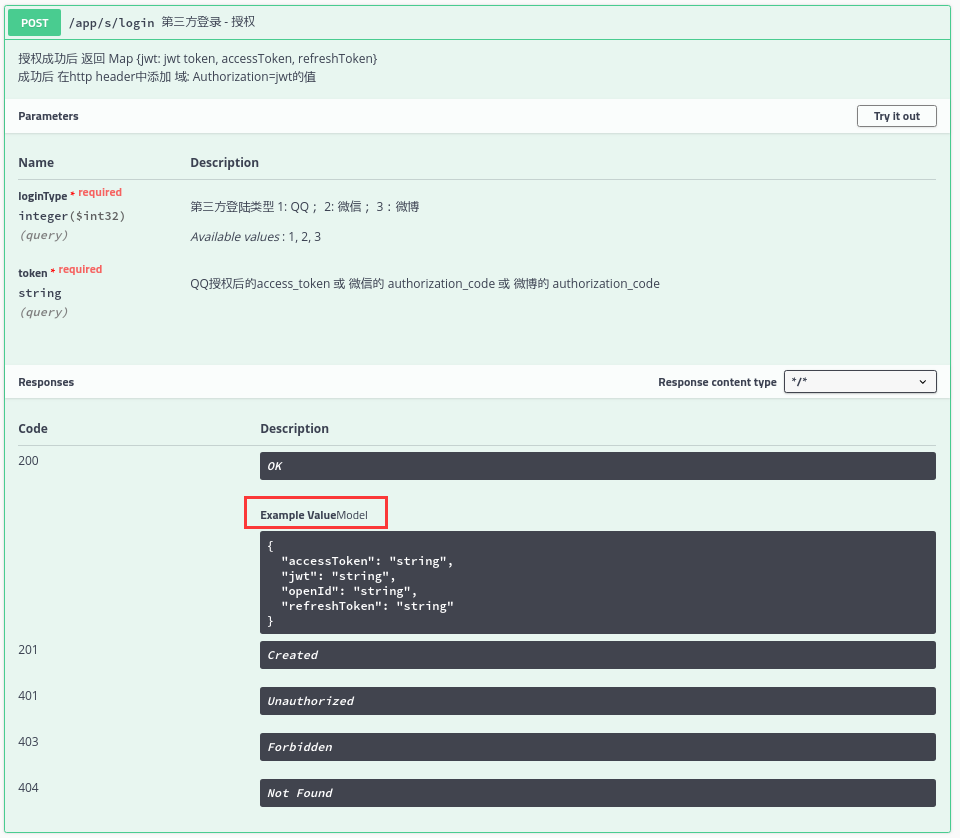
接口认证
Authorize 按钮, 填入合法的认证值,模拟授权。
最终结果
打开 http://localhost:8080/project_name/swagger-ui.html ,project_name表示你启动项目的名称,如果你以根目录启动则没有project_name,当你看到如下界面就表示配置成功了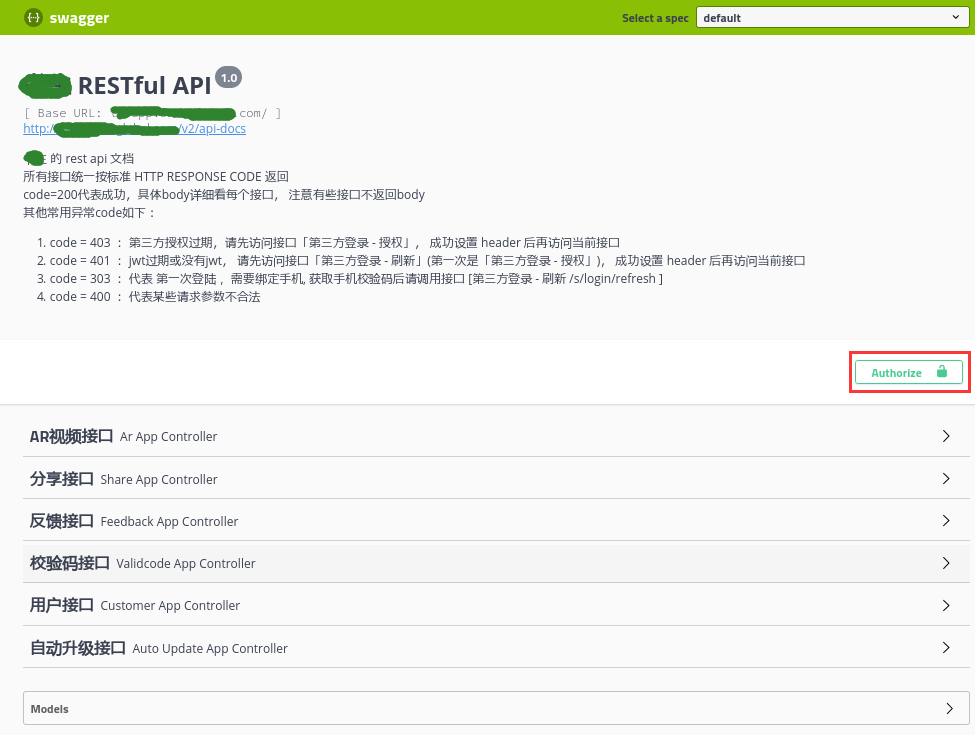
点开具体接口, 有惊喜 哈哈。Try it out! 可以实时测试接口